Part 1 of 5
Getting started
Create your account, set up your booking link, choose how customers pay and connect Razorpay. About 5 minutes.
Read the 7 steps
Step 1.1
Create your account
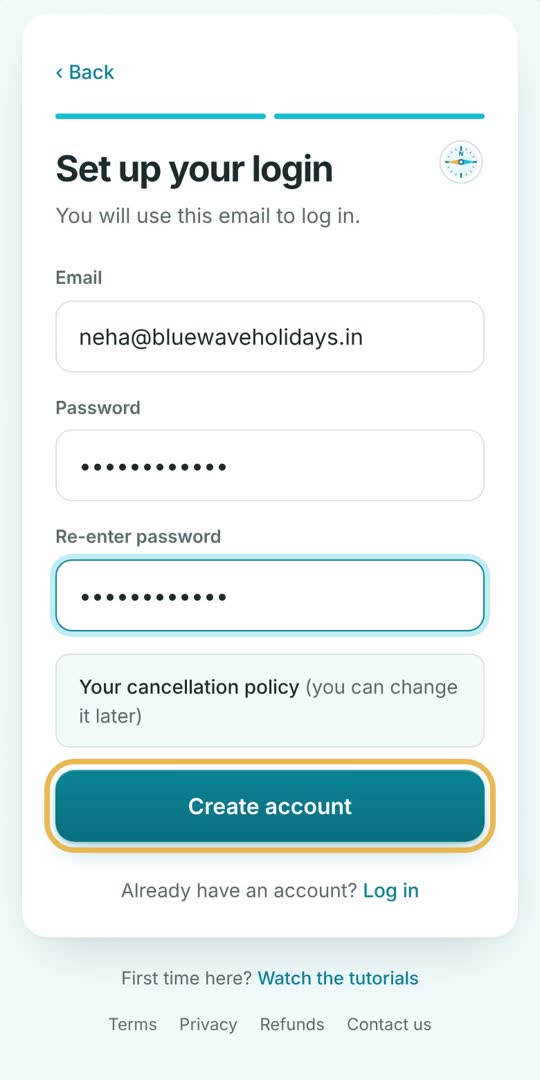
Open tours.webstination.com/signup. Type your business name, your name and mobile, and tap Continue. Then add your email and a password, and tap Create account. Your first 30 days are free.
Step 1.2
Your Home screen
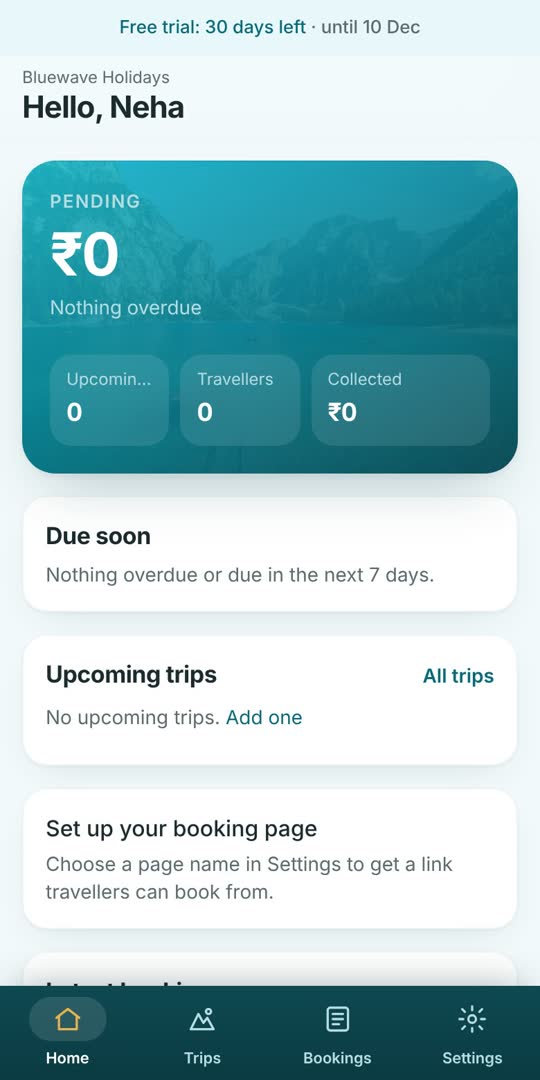
You land on Home. It shows the money you have collected, what is pending and overdue, and your upcoming trips. The tabs at the bottom take you to Trips, Bookings and Settings.
Step 1.3
Business details and booking link
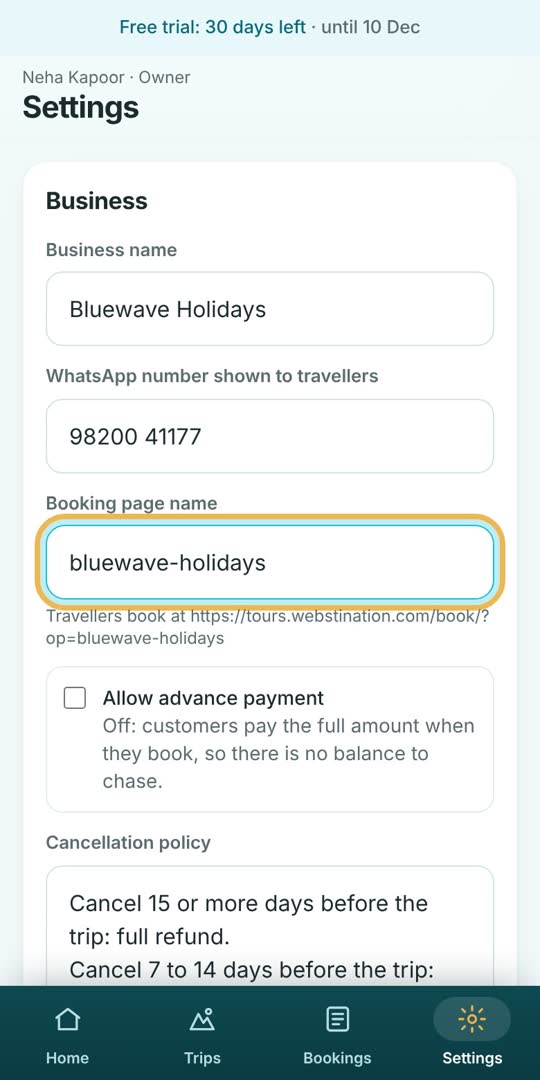
Go to Settings. Check your business name and the WhatsApp number travellers will see. The booking page name becomes your booking link, for example tours.webstination.com/book/?op=bluewave-holidays.
Step 1.4
Advance payment, on or off
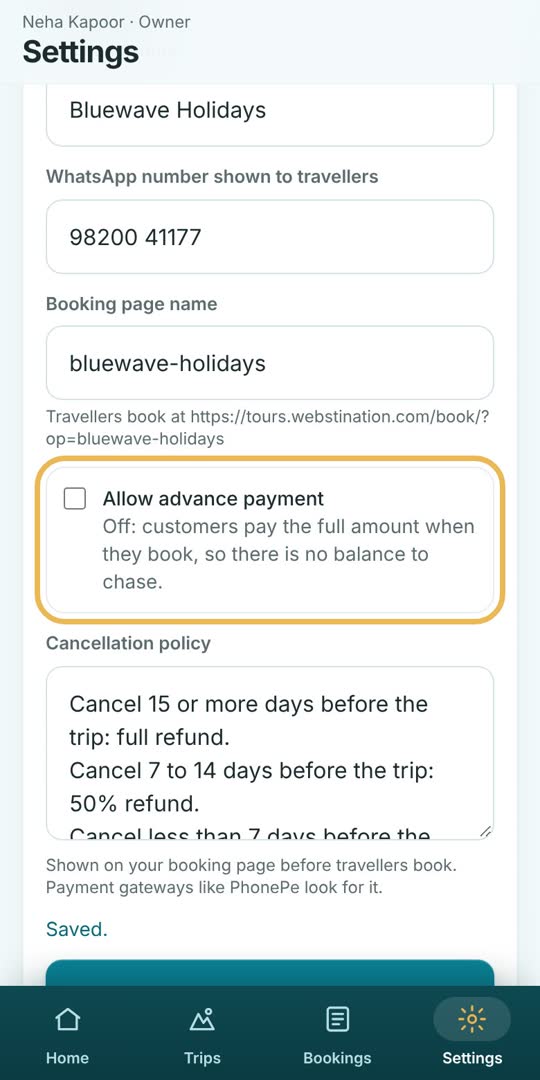
Allow advance payment is off at first. Customers then pay the full amount when they book, so there is no balance to chase later. Turn it on only if you want an advance now and the rest later. Tap Save.
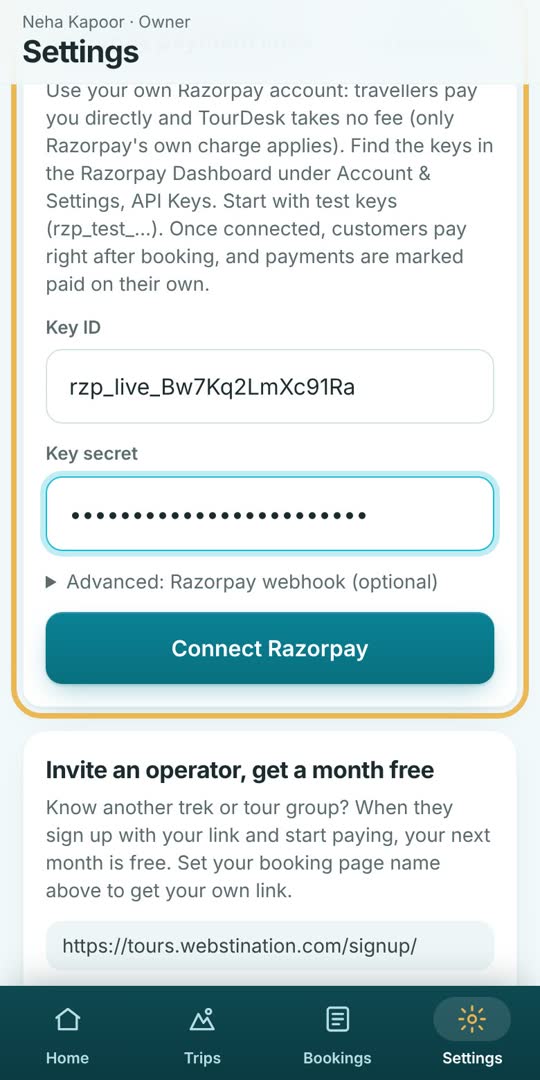
Step 1.5
Connect your Razorpay
To take online payments, connect your own Razorpay account. In the Razorpay dashboard, open Account and Settings, then API Keys, and copy the Key ID and Key secret here. Money goes straight to your bank account. TourDesk takes no fee.
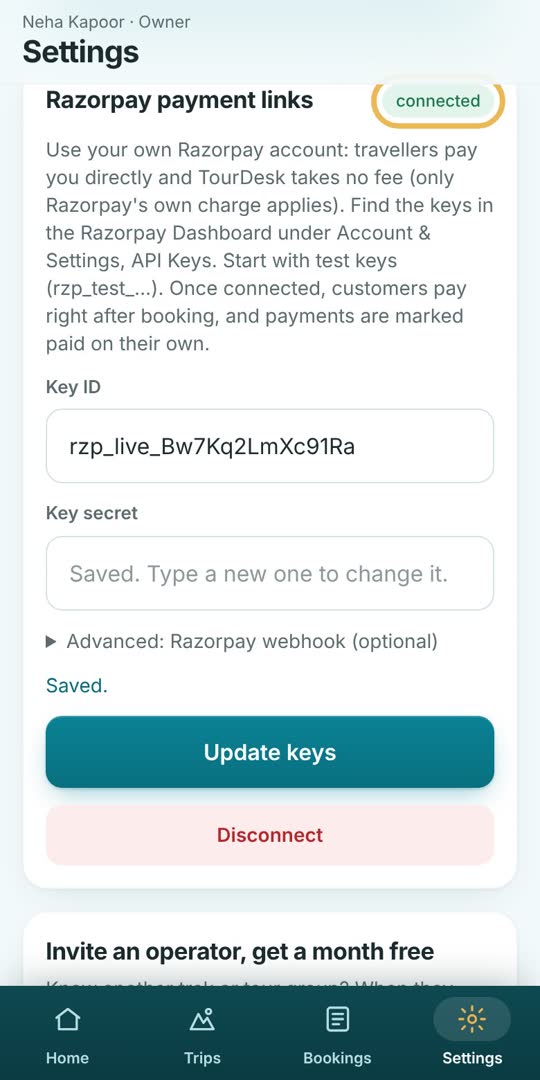
Step 1.6
Razorpay connected
TourDesk checks the keys with Razorpay before saving them. When the label says connected, online payments are on for all your trips.
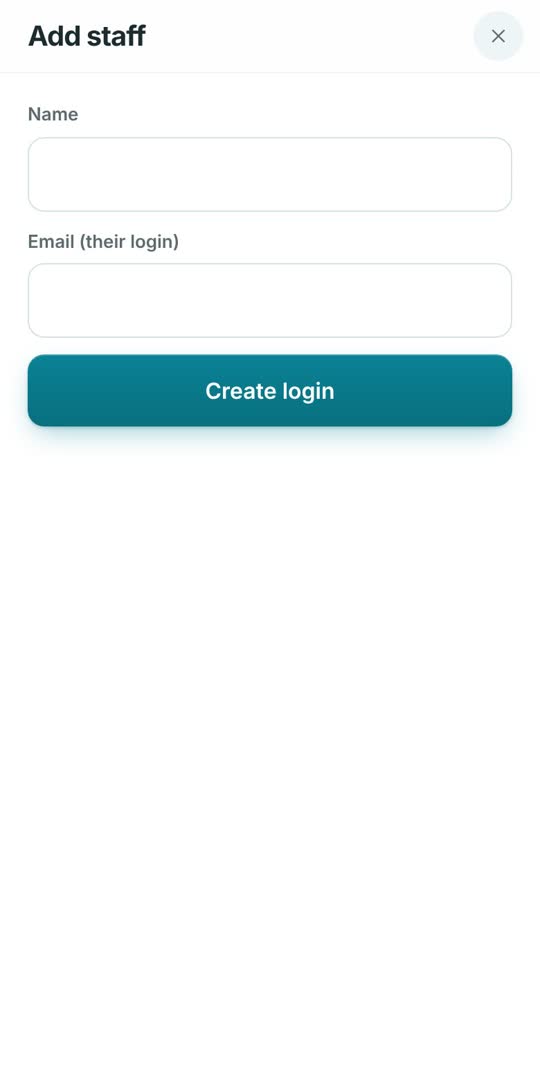
Step 1.7
Add your team
If someone helps you with bookings, tap Add staff. They get their own login. Staff can manage trips and bookings, but cannot change settings or delete trips.
Part 2 of 5
Creating trips
Add a trip with its dates, price and seats, add photos of every package, and share your booking link.
Read the 6 steps
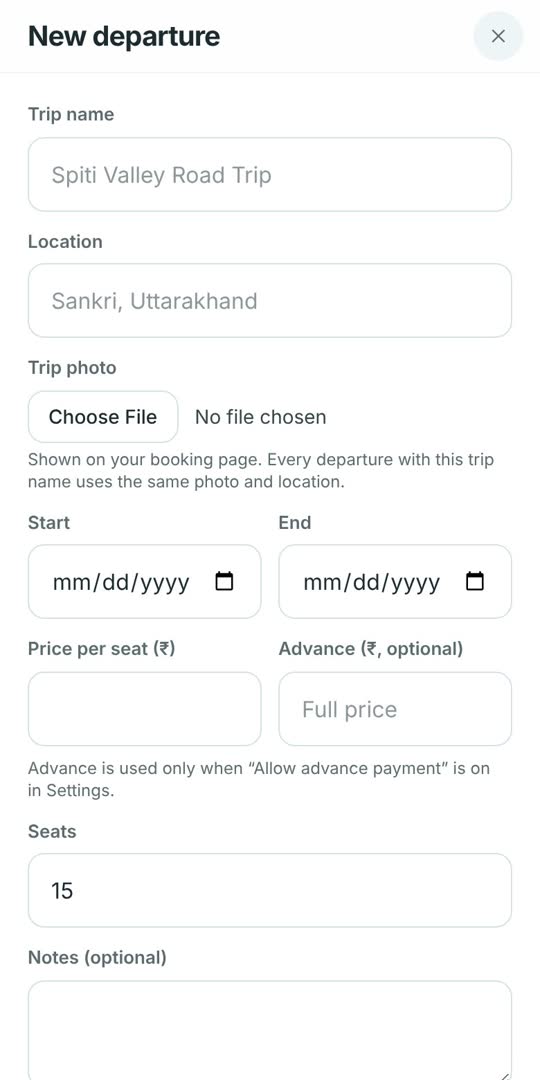
Step 2.1
Add a trip
Open the Trips tab and tap New trip. Each date you run a tour is one departure, so a package you run every month gets one entry per date.
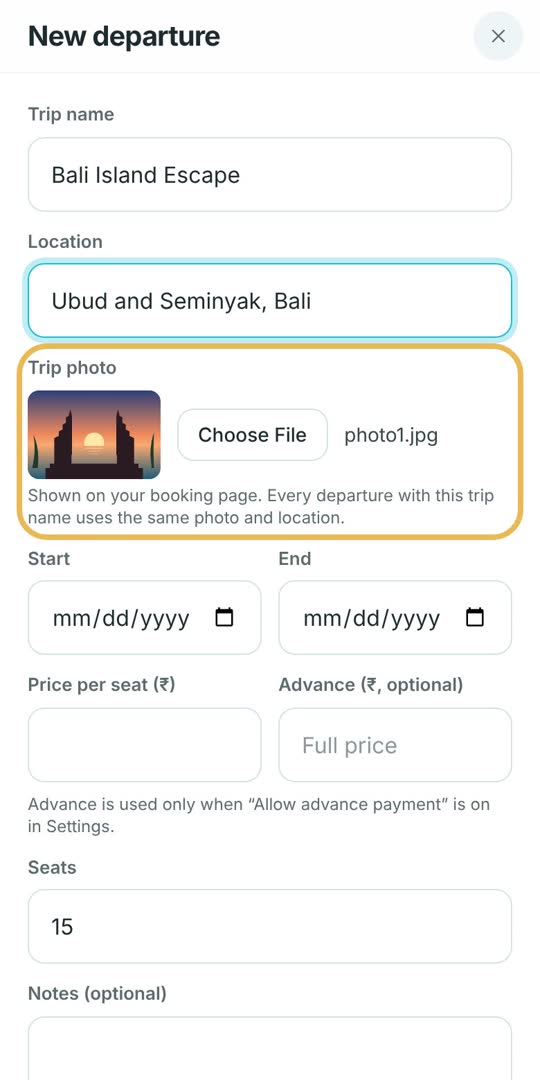
Step 2.2
Name, place and photo
Type the trip name and where it goes, and choose a cover photo from your phone. The photo is made smaller automatically, so it uploads fast on mobile data.
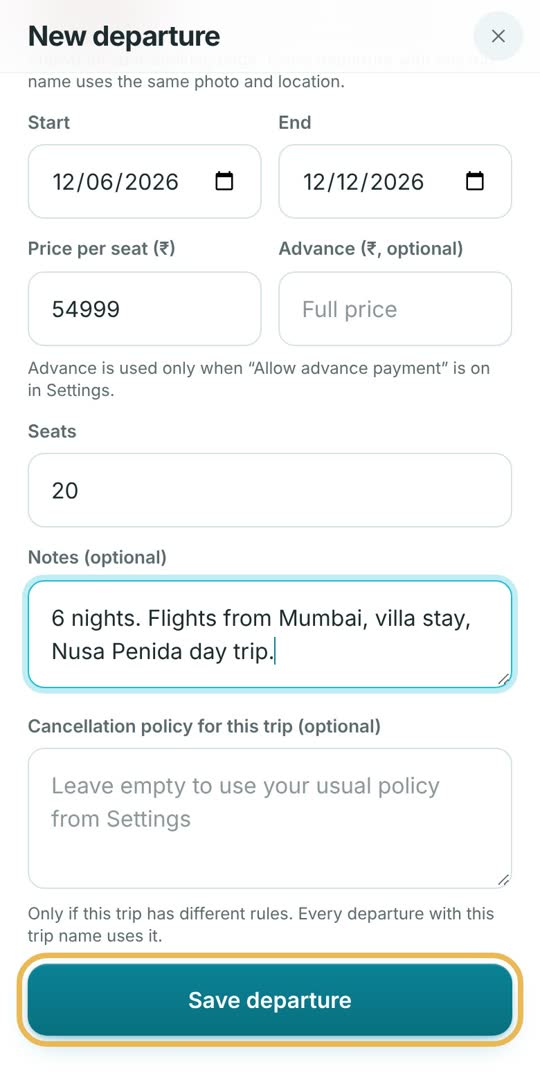
Step 2.3
Dates, price and seats
Add the start and end dates, the price per person and the number of seats. Leave Advance empty unless you allow advance payments. Then tap Save departure.
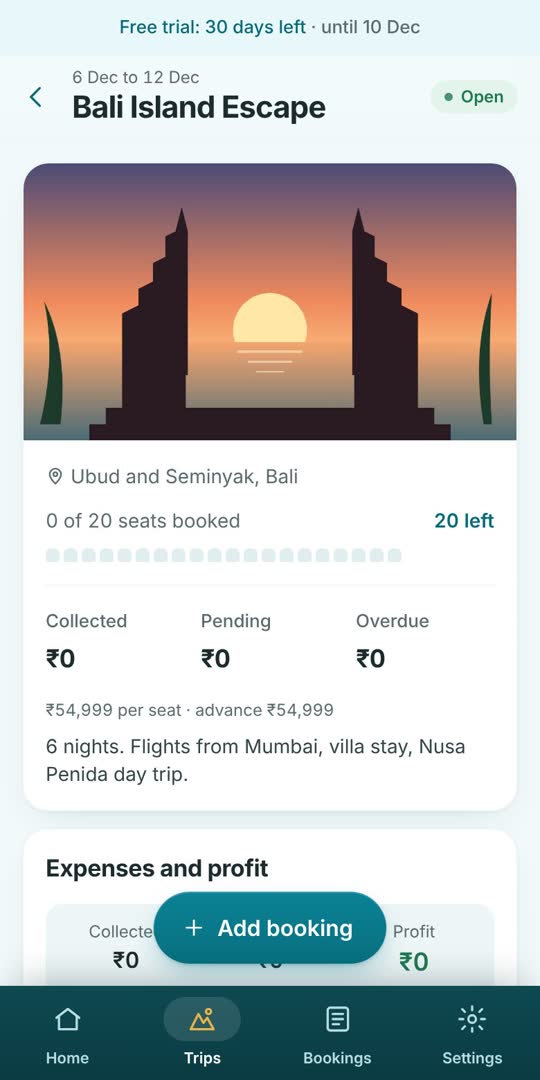
Step 2.4
Your trip page
Tap the trip to open it. You see the photo, seats booked and left, and the money collected, pending and overdue for this date.
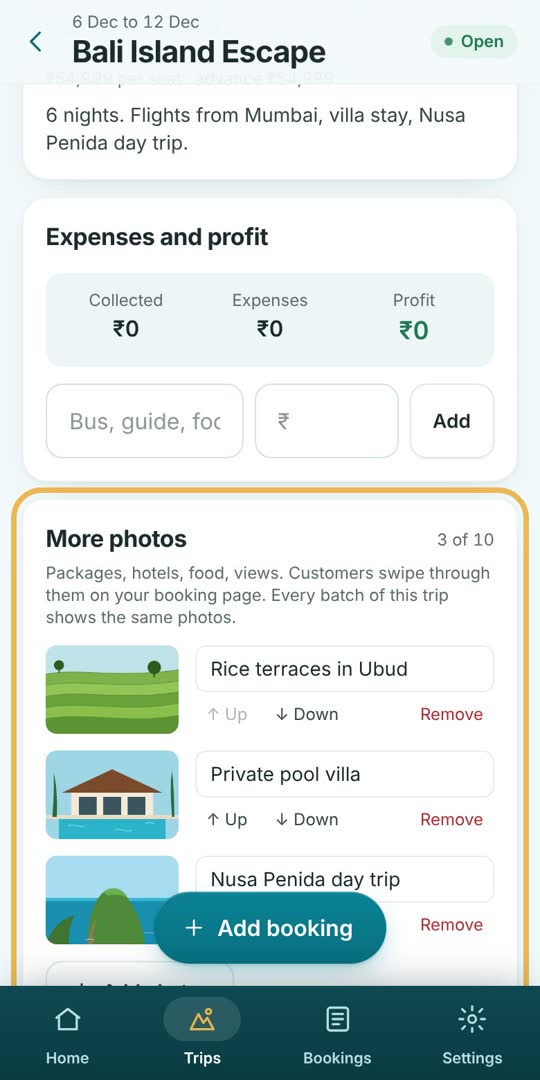
Step 2.5
More photos for packages
Under More photos, add up to 10 extra pictures: packages, hotels, food, views. Give each a caption like Private pool villa. Use Up and Down to change the order. Customers swipe through them on your booking page.
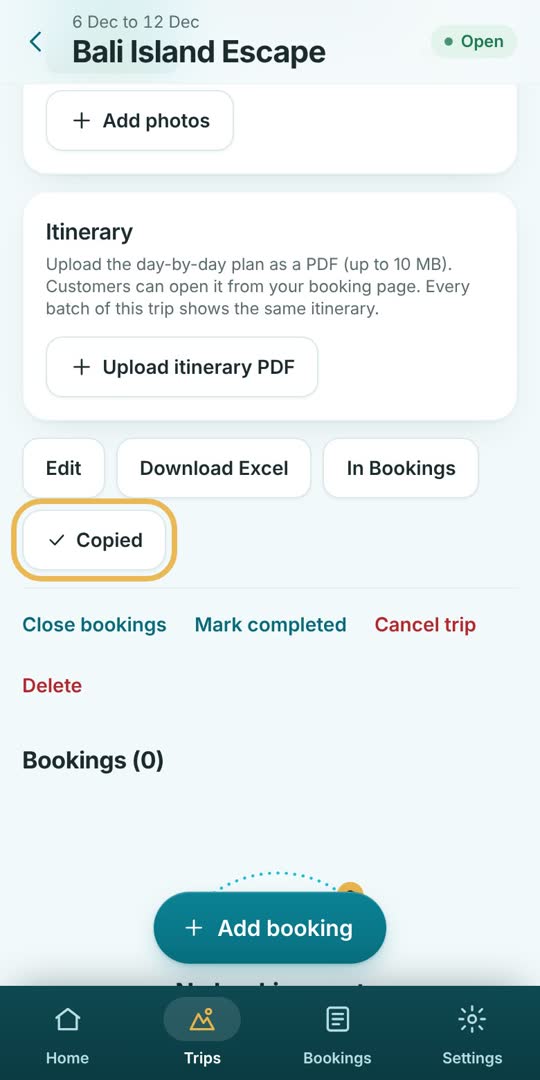
Step 2.6
Share the booking link
Tap Copy booking link and send it on WhatsApp or put it in your Instagram bio. Adding another date with the same trip name reuses the same photos, location and reviews.
Part 3 of 5
How customers book and pay
What your customer sees, from choosing a trip to paying online, and the waiting list when a trip is full. Nothing to do on your side.
Read the 9 steps
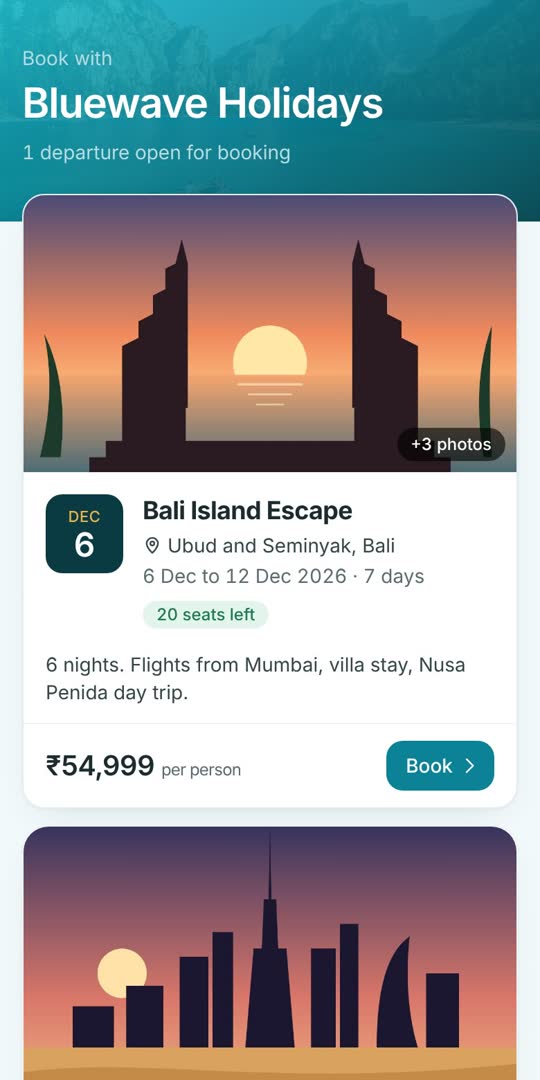
Step 3.1
What your customer sees
This is your booking page. Customers see every open trip with its photo, dates, price and seats left. They tap the trip they want.
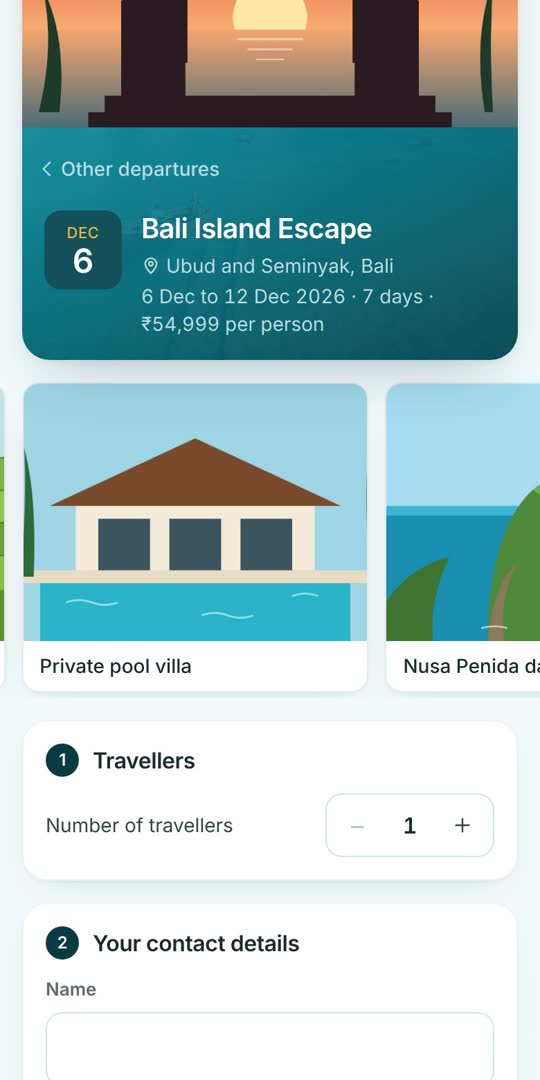
Step 3.2
Photos of every package
They can swipe through your extra photos, and tap one to see it full screen.
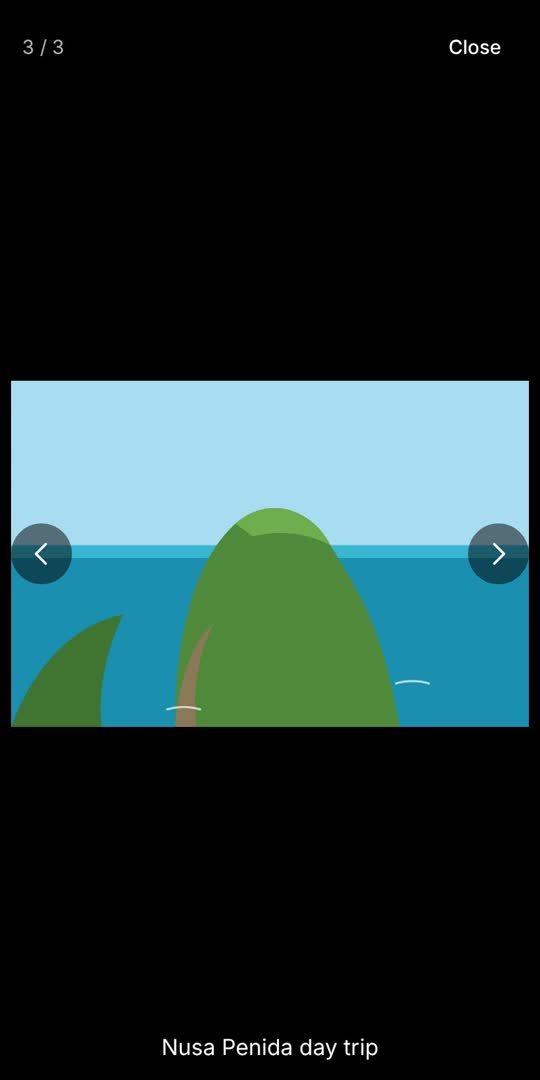
Step 3.3
Full-screen photos
The full-screen view shows the caption and has next and previous buttons.
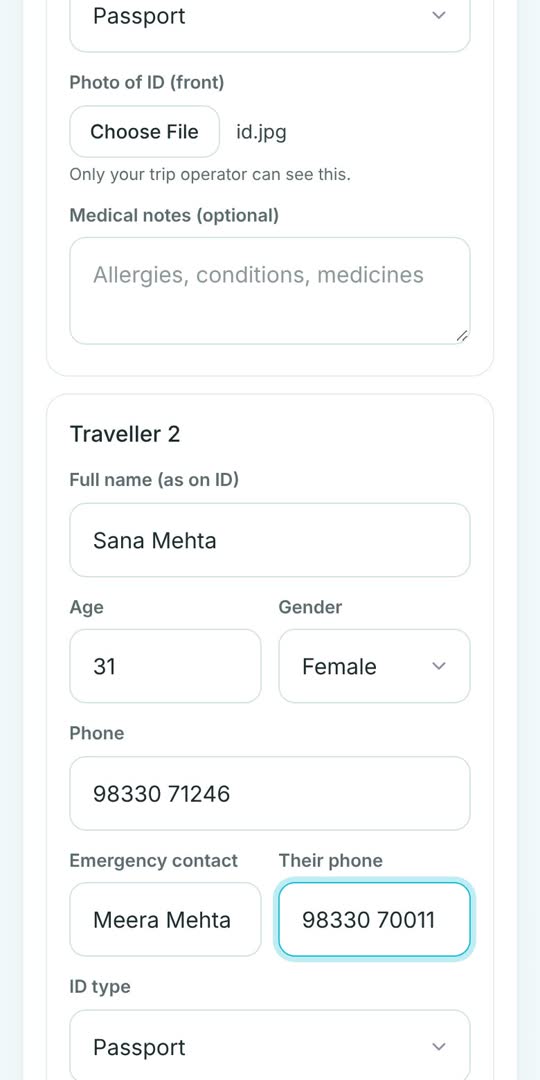
Step 3.4
Traveller details and ID
They choose the number of travellers and fill in each person's details, emergency contact and a photo of their ID. Only you can see the ID photos.
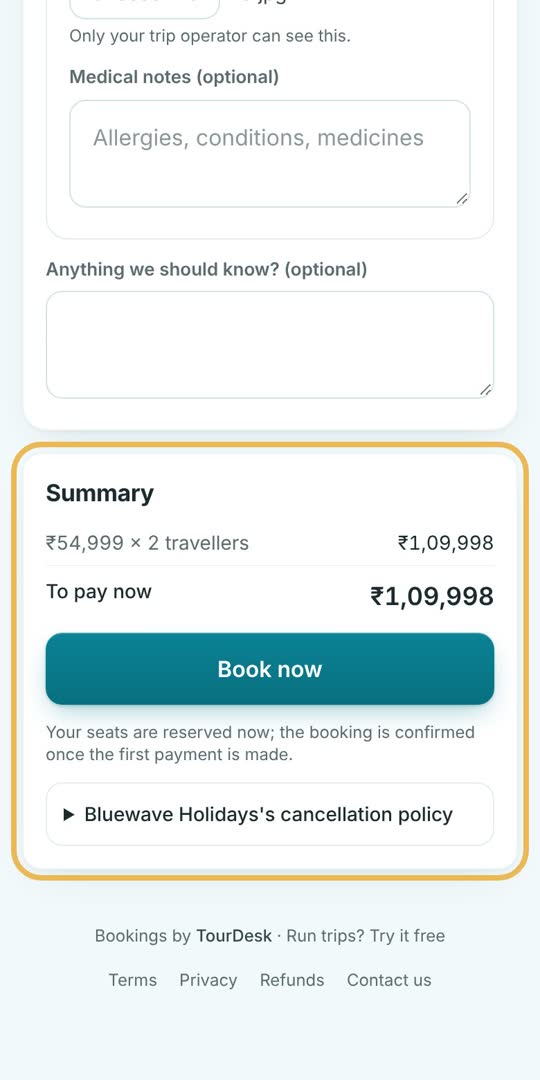
Step 3.5
Pay the full amount
The summary shows the amount to pay now. With advance payment off, that is the full price. They tap Book now.
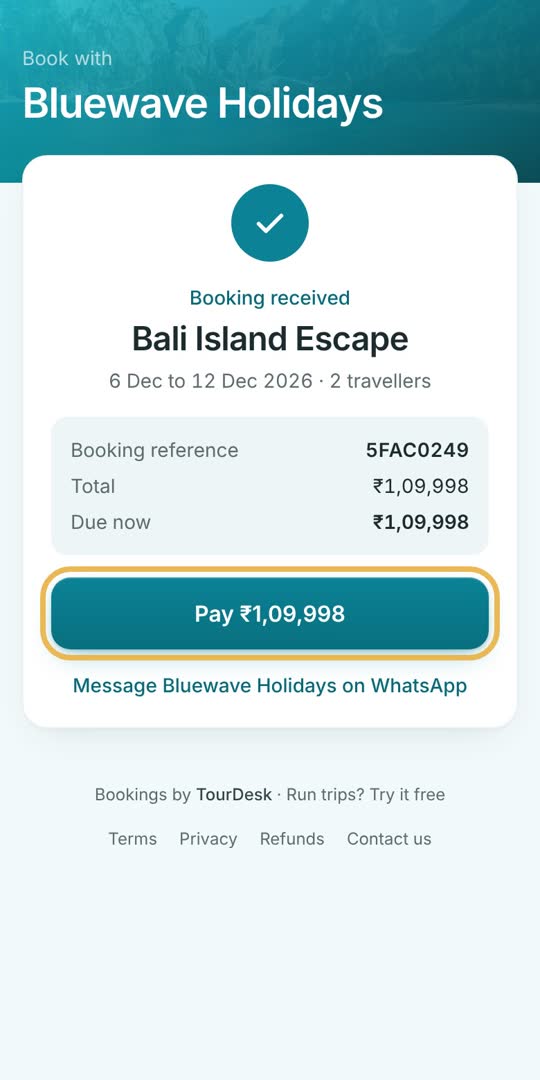
Step 3.6
Booked, now pay
The seats are reserved and the customer gets a booking reference. They tap Pay, which opens Razorpay's secure page for UPI, card or net banking.
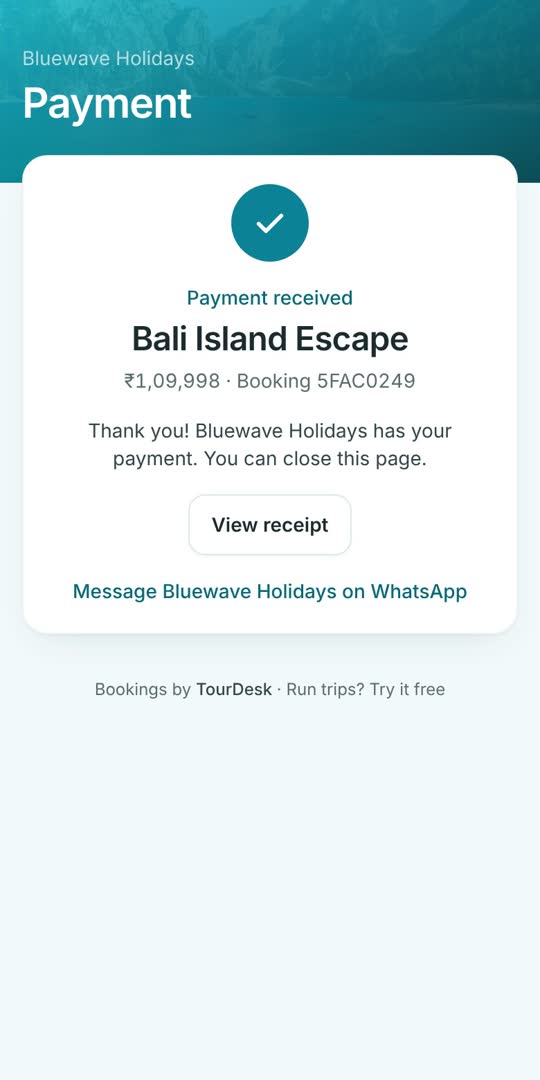
Step 3.7
Payment received
After paying, Razorpay sends them back here: Payment received. They can open their receipt or message you on WhatsApp. You never have to mark it paid yourself.
Step 3.8
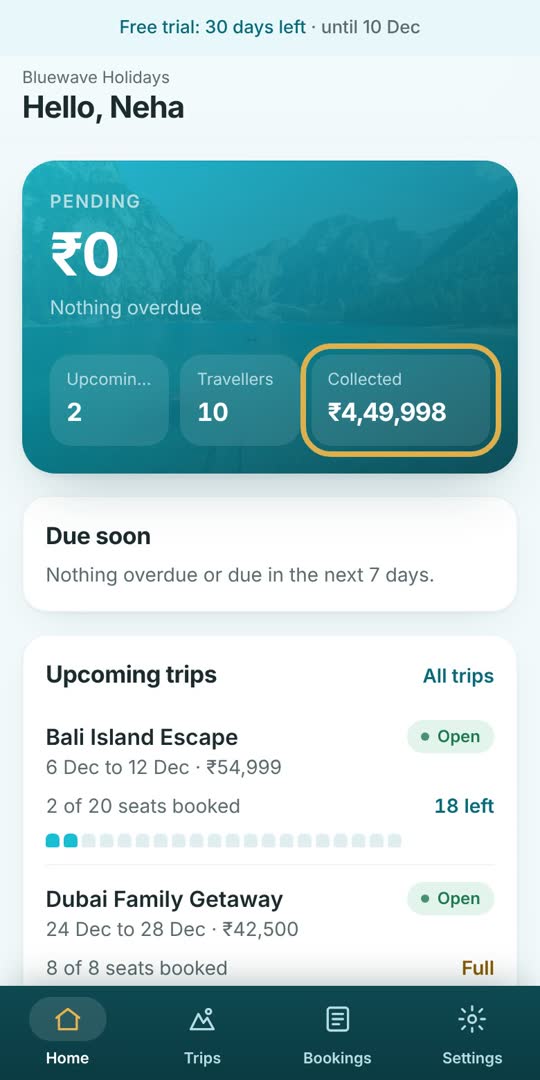
You see it straight away
On your Home screen, Collected goes up and the booking shows as paid online. If someone closes the page before coming back, TourDesk checks with Razorpay every few minutes and marks it paid anyway.
Step 3.9
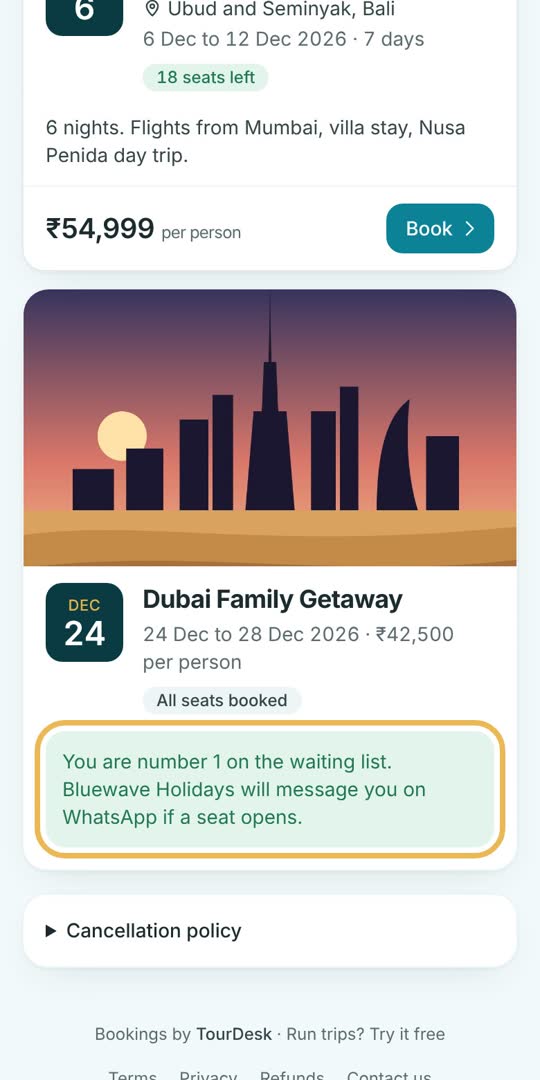
When a trip is full
When every seat is booked, customers can join your waiting list instead. You see them on the trip page, and when a seat opens you message them in one tap.
Part 4 of 5
Bookings, payments and reminders
Add bookings yourself, record cash or UPI payments, send reminders with a pay link, send receipts, see your profit and download your traveller list.
Read the 7 steps
Step 4.1
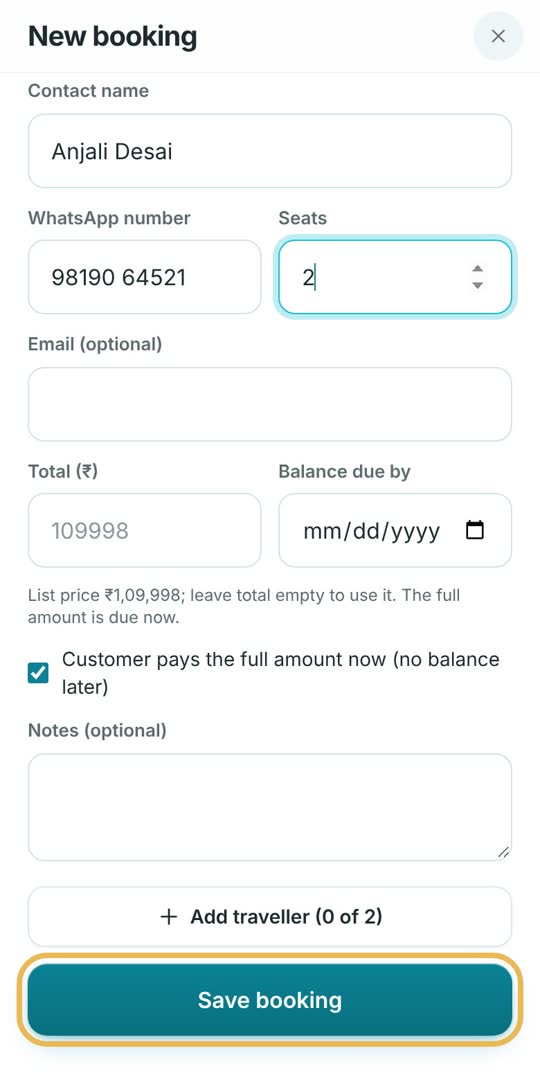
Add a booking by hand
Got a booking on a phone call? Open the trip and tap Add booking. Type the contact name, WhatsApp number and seats. Traveller details can be added now or later.
Step 4.2
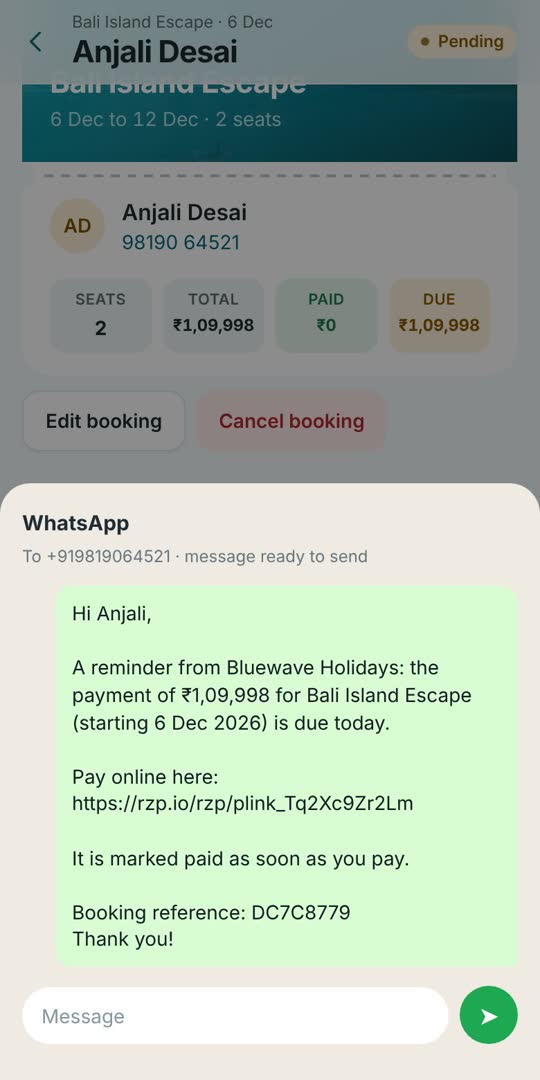
Payments on a booking
Each booking shows its payments. Remind on WhatsApp opens a ready message with the Razorpay pay link inside, so the customer can pay in one tap.
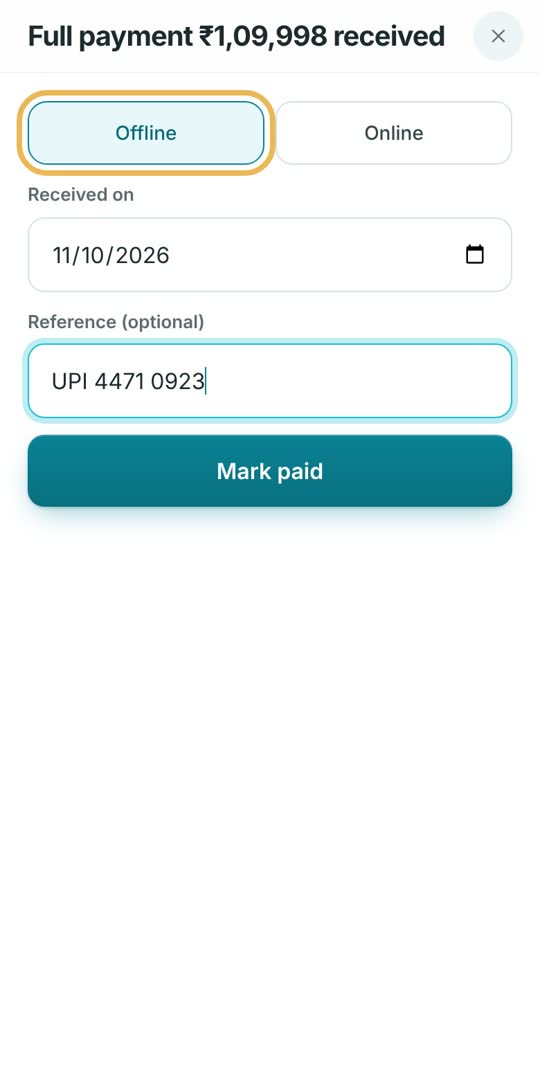
Step 4.3
Paid in cash or UPI directly?
If the customer paid you outside TourDesk, by cash, direct UPI or bank transfer, tap Mark paid and choose Offline. Only you can mark a payment as paid, never the customer.
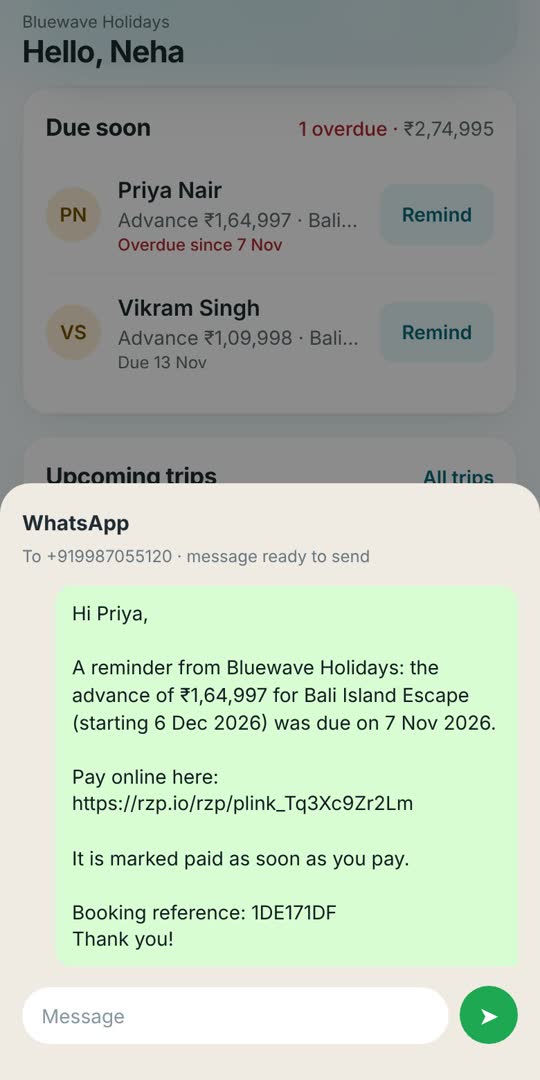
Step 4.4
Due soon on Home
Home lists every payment due in the next 7 days, with overdue ones in red. Tap Remind next to a name to send the reminder with the pay link.
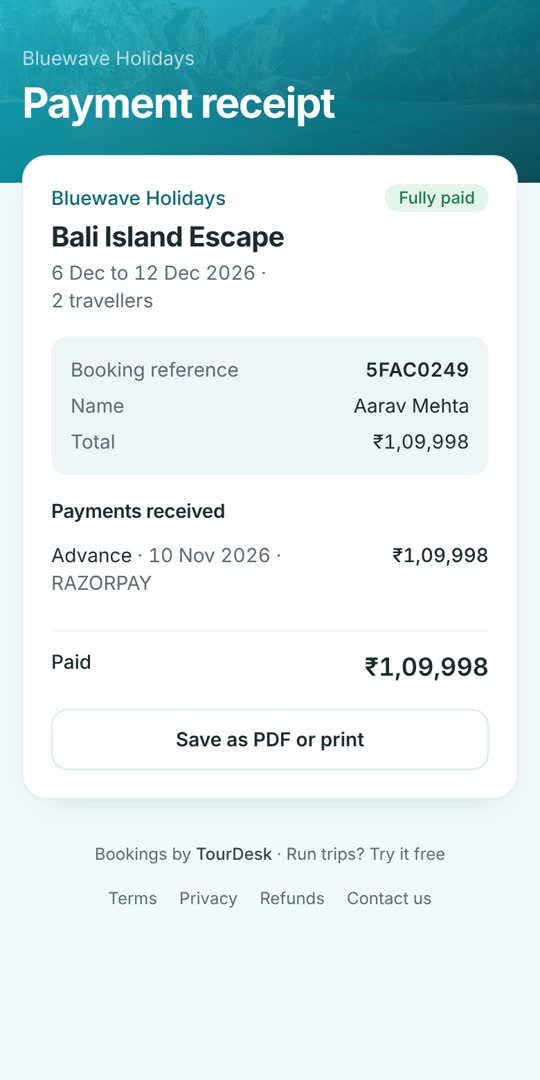
Step 4.5
Send a receipt
Every payment gets a receipt. On the trip page, tap Send receipt on WhatsApp. The customer opens a page that shows what is paid and what is still due.
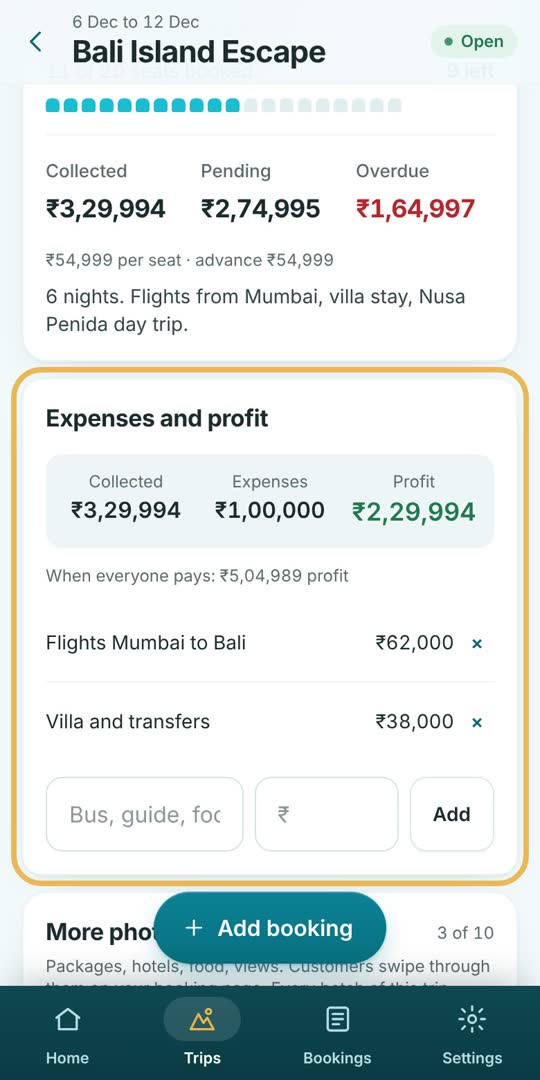
Step 4.6
Profit for every batch
Add what the trip costs you, like flights, hotels and guides. TourDesk takes it away from what you collected and shows your real profit for that date.
Step 4.7
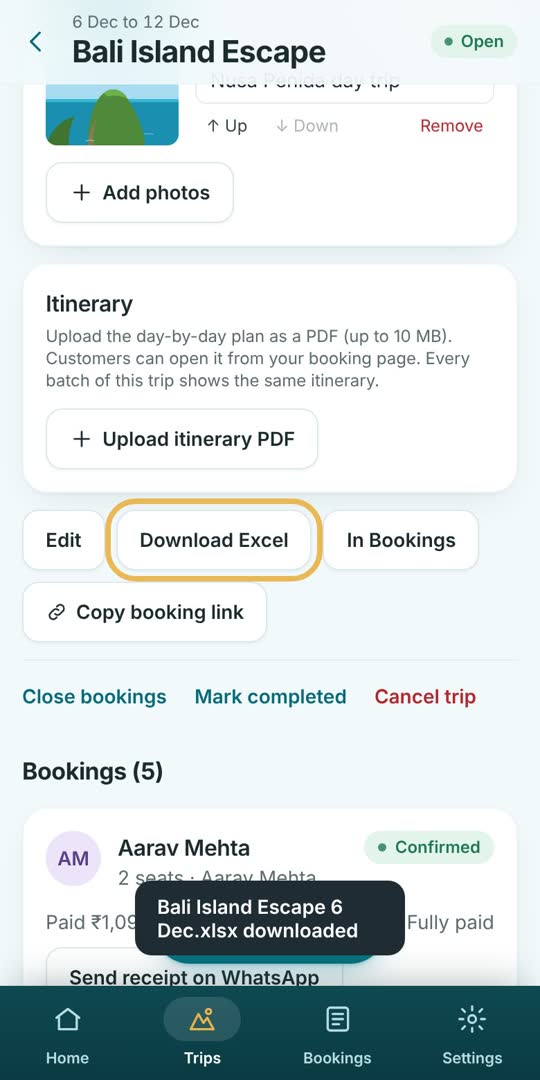
Traveller list in Excel
Before the trip, tap Download Excel for a list of every traveller with phone, emergency contact and payment status. You can also connect a Google Sheet in Settings to keep a live copy.
Part 5 of 5
Reviews after the trip
Collect reviews on WhatsApp and show them on your booking page.
Read the 4 steps
Step 5.1
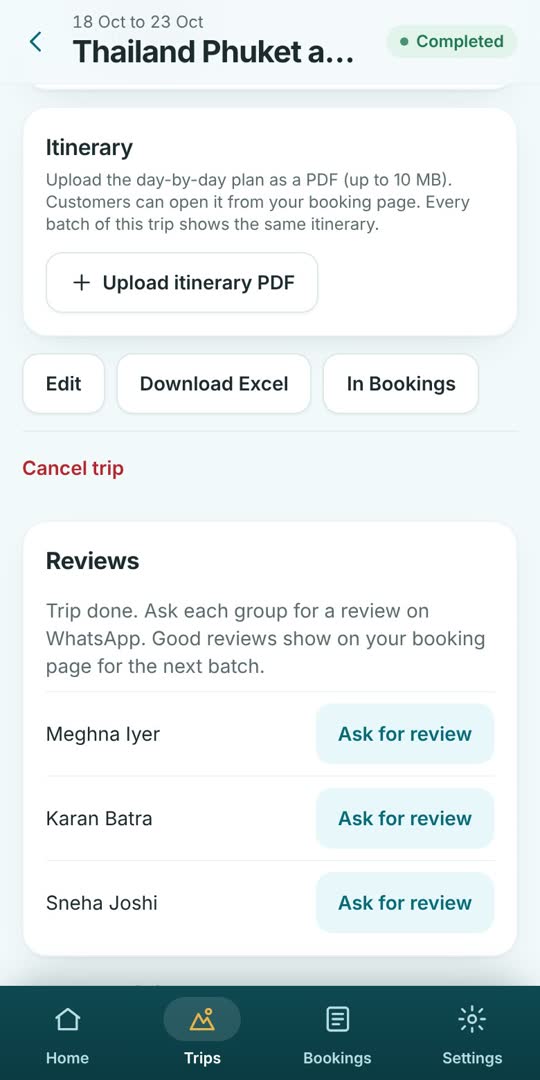
After the trip
When a trip is over, open it and tap Mark completed. Trips also count as done once their end date has passed.
Step 5.2
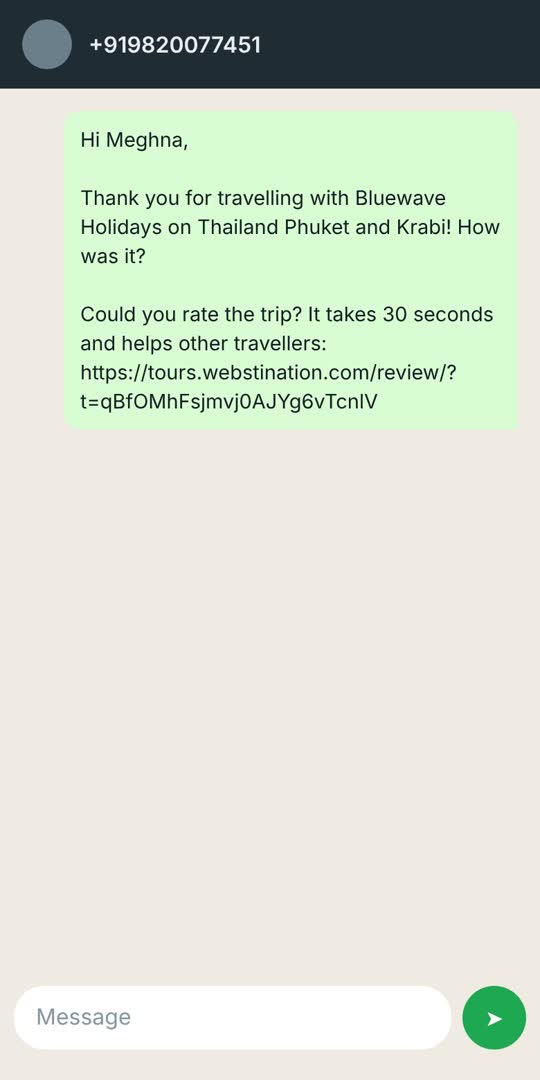
Ask for a review
Tap Ask for review next to each group. WhatsApp opens with a message and a private review link for that customer.
Step 5.3
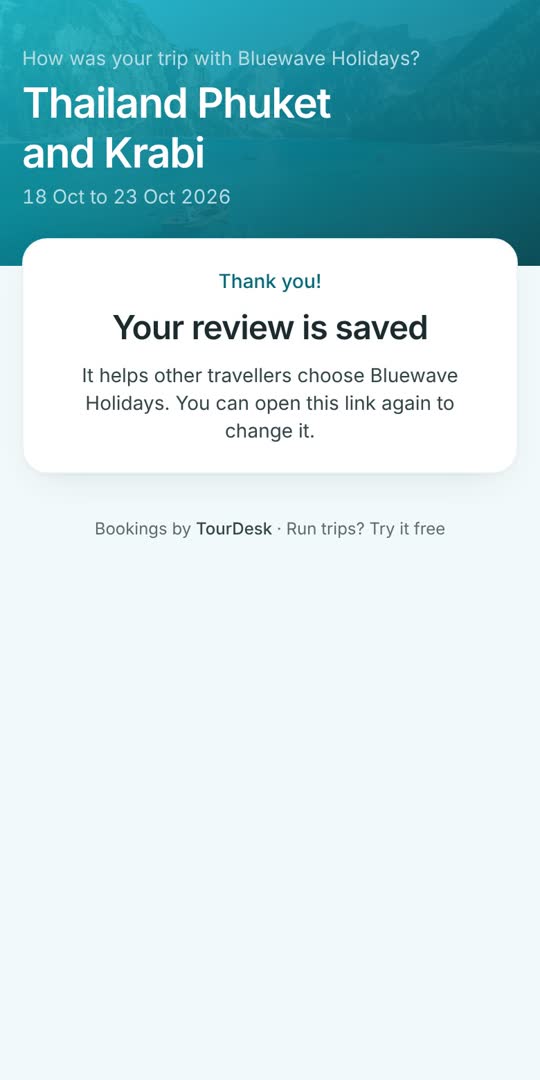
Your customer rates the trip
The customer taps 1 to 5 stars, writes a line and sends it. No login needed.
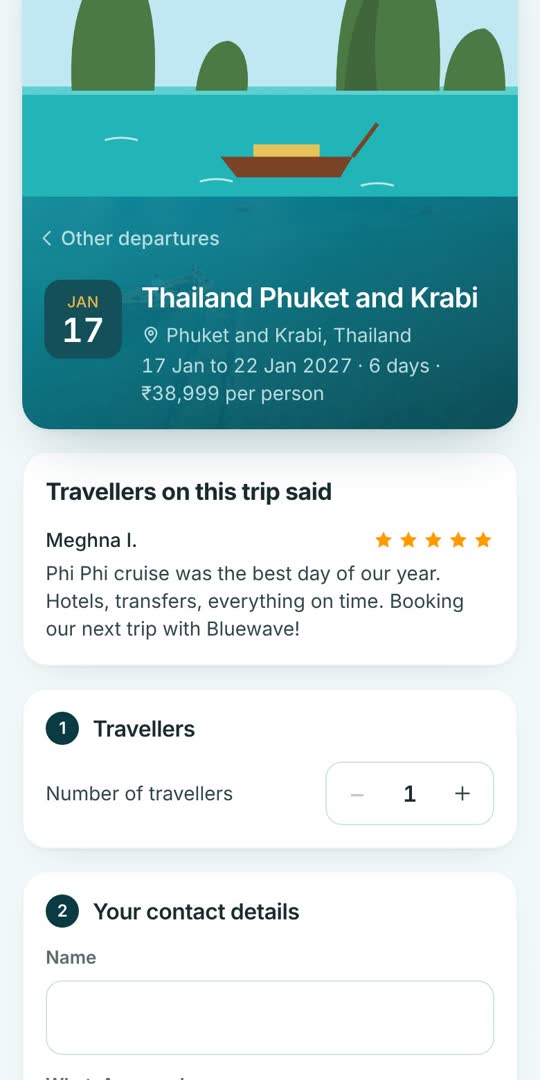
Step 5.4
Reviews win you the next batch
Reviews appear on your booking page with the first name only, and stay with the trip for every future date. You can hide any review from the trip page.
Quick answers
Does TourDesk take a cut of my payments?
No. Customers pay through your own Razorpay account and the money goes to your bank. Only Razorpay's own charge applies.
Do I need Razorpay?
No. Without it, TourDesk still tracks bookings and payments. You mark payments as paid yourself (Offline), and reminders ask the customer for a screenshot.
Can a customer mark a payment as paid?
No. Online payments are marked paid only after Razorpay confirms them. Cash, direct UPI and bank transfers are marked paid by you or your staff.
A customer paid but closed the page before coming back. Is it lost?
No. TourDesk checks unpaid links with Razorpay every few minutes and marks them paid on its own. You can also tap Check payment on the booking.
I turned advance payment off. What happens to bookings that paid only the advance?
Nothing changes for them. Their balance stays due on its date and shows under Due soon. Tap Remind to send the pay link.
How many trips, travellers and photos can I have?
As many trips and bookings as you need. One booking can have up to 500 seats, which is enough for school groups. Each trip has a cover photo plus up to 10 extra photos.
I run the same tour every month. Do I add it again each time?
Add one departure per date with the same trip name. Every date shares the photos, location and reviews, so you only upload them once.
How do I cancel a booking or a trip?
Open it and tap Cancel booking or Cancel trip. Seats free up and unpaid amounts are dropped. Paid amounts stay on record. Refunds are made from your Razorpay dashboard.
Can my staff use it?
Yes. In Settings, tap Add staff. Staff can manage trips, bookings and payments, but cannot change settings, the team or delete trips.
How do I log out?
Settings, then Log out at the bottom of the page. On a computer it is also in the left sidebar.
What happens after the free month?
Nothing stops. You move to the free plan: everything keeps working, with one open batch at a time. The ₹799 plan runs as many batches as you like. Invite another operator from Settings and you get a month free when they start paying.
Can I use it on a computer too?
Yes. Open tours.webstination.com in any browser. On a phone, use Add to Home Screen to open it like an app.